Monday, November 14, 2011

2nd Marking Period Homework


________________________________________________________________________________
9th Grade Foundation

Still Life Arrangements

Complete the following in your sketchbooks.

Note:
A. All objects must have obvious highlight and shadow. Please include cast shadows when they are present.
B. All images must fill the page.
C. When showing more than one object in a composition, the objects must overlap.

1. A bathrobe, nightgown, or pajamas hanging on a hook or doorknob.
2. An arrangement of three pots and pans of various sizes.
3. A group of three toys of different sizes.
4. A view of an umbrella (opened), resting on the floor, upside down.

Figure Drawing: The following clothed figures are to be rendered in 4B, graphite pencil. You must include evidence of an obvious light source and appropriate values for describing the horizontal and vertical space around the figure. All figures are to fill the page and be in 3/4 view. All figures must be drawn from life, no photographs.

5. A standing figure
6. A figure sitting on a stool
7. A figure reclining on a sofa, bed, or floor
8. A figure squatting
9. A figure leaning against a wall
10. A figure leaning over to pick something up.

The drawings will be evaluated on:
a. Accuracy of proportion
b. gesture
c. view
d. highlight and shadow
e. vertical and horizontal space

ALL SKETCHBOOK WORK FOR FRESHMEN DUE: WEDNESDAY JANUARY 18TH
________________________________________________________________________________

10th Grade Intermediate

Still Life Arrangements

Complete the following in your sketchbooks.

Note:
A. All objects must have obvious highlight and shadow. Please include cast shadows when they are present.
B. All images must fill the page.
C. When showing more than one object in a composition, the objects must overlap.

1. A stove with two pots
2. Two or more trash cans/recycling bins, one with it's lid propped against it
3. A group of three books, one opened
4. A bicycle in three-quarter view
5. A three-quarter view of a computer and it's keyboard

ALL SKETCHBOOK WORK FOR SOPHOMORES DUE: TUESDAY JANUARY 24TH

Special Project

Subject- A cluttered interior corner of any room in the house. ( kitchen, bathroom, bedroom, tv room, garage, etc.)
Size - 18 X 24 inches
Medium- Any color medium, wet or dry (pastels, oil chalks, markers, colored pencils, watercolors, acrylics )
Requirements:
- Must show two walls ( but not equally )
- Must contain a lot of objects
- Must be viewed above or below eye level
- Must show an obvious light source

* Sketches for final piece may be completed in your sketchbook.
B/W Sketches Due: Wednesday November 30th
Color Sketches due: Wednesday December 14th
Final Piece is due: January 12th

________________________________________________________________________________

11th/12th Grade Advanced

1. CLOUD SKYSCAPE

- You are to depict a landscape or cityscape where the CLOUD-FILLED SKY commands MORE THAN 50% OF THE COMPOSITION.
- Naturally, you must include FOREGROUND AND MIDDLE GROUND (and BACKGROUND where applicable).
- You may employ any point of view while AVOIDING PARRALLEL SPACE AND A BULL'S EYE COMPOSITION (DEAD CENTER COMP.)
- TIME OF DAY and the accompanying Light Source must be obvious.
- Your COLORS will reflect the time of day depicted.
- Any color medium, wet or dry (pastels, oil chalks, markers, colored pencils, watercolors, acrylics, oils, etc. )

The pieces will be evaluated on:
- Composition
- Depiction of Space
- Light
- Use of color
- Craftsmanship

B&W sketch Due: Tuesday Novermber 29th
Color Sketch Due: Tuesday December 6th
Final Piece Due: Tuesday December 20th

3. FIGURE IN SPACE

SUBJECT: You are to capture in mid gesture, a figure in deep space. The space is the actual place where the figure's action is taking place.
- Your figure will be in the middle ground, which allows us to see the entire figure surrounded by foreground and background objects.
- The figure must be in three-quarter view
- You will view this figure in it's space above or below eye level.
- Your view will demonstrate a strong, direct light source.

SIZE: 18 x 24 inches

MEDIUM: Oil or Acrylic Paint

The pieces will be evaluated on:
- Composition
- Accuracy of proportion
- Depiction of Space
- Light
- Use of color
- Gesture
- Craftsmanship

B&W sketch Due: Thursday December 22nd
Color Sketch Due: Wednesday January 4th
Final Piece Due: Tuesday January 19th

4. ART JOURNAL
Your personal ARTISTIC journal is your daily record of your thoughts, realizations, concerns, hopes, fears and reactions to any event in your private or public life.
What will distinguish this journal from all others is the ARTISTIC way you are going to combine your PICTORIAL and VERBAL "notes". They will be integrated within a "single" or a "double page spread" in such a way that one cannot be successfully separated from the other. Your text may be painted or printed but it must be INTEGRATED into the visual concept of the page as a visual balance of the page is what you wish to achieve.
You are required to submit a minimum of 20 pages in full color using a mix of media.

Final Due Date: Monday January 23rd 2012

________________________________________________________________________________

Thursday, November 10, 2011

The Importance of Value in Painting

I found the following images on Anne Kullaf's Blog Loosen Up. It is an excellent example of underpainting and the development of a painting.
This first image shows an incomplete underpainting that resolves issues of proportion, and begins to address value. This underpainting was done using a tinted ground (gesso and some light red ochre) and burnt umber. The values are beginning to be established by the use of washes to block in medium and light values and an undiluted application will block in the darker values.


Notice in this slide the underpainting is blocking in the rest of the background information. Underpaintings are meant to establish a firm structure for your painting but do not need to be resolved and finished in the same way that a finished painting is finished. Notice how loose and gestural the figures and marks are.


This slide illustrates the initial blocking in of color. Notice that we are working with large simple blocks of color or shape, always work from large simple shapes down to smaller more complex shapes. Resist the urge to jump into details.


More color is being introduced. Notice that the artist is starting to work into smaller shapes and that some areas of the underpainting are showing through. You do not have to always use a neutral color but you can see here why it may be helpful because it is harmonious with the palette being used. Imagine if the preliminary underpainting was completed in a bright red or neon green and imagine the effect that might have.


The artist is continuing to refine the painting and developing a nice range of values by mixing tints tones and shades of color. Edges are being cleaned up and objects are brought to a higher level of clarity.


This is the finalized painting. At this point the artist has provided "eye candy" using fully saturated jewel like colors to add details like the lettering in the sign for the restaurant.


This is a detail of one of the figures in this painting. This is a wonderful example that sometimes less is more. The face of this figure is merely suggested through tonal variation as opposed to being meticulously rendered. As an artist you will have to make decisions about how much information to supply the viewer. This is an extremely useful tool to guide the viewers eye around your work.

Wednesday, November 9, 2011

NBC LEARN


Take a minute to register with NBC Learn HERE

Use the registration code: IWU5AL

Wednesday, November 2, 2011

Advanced Class (11th/12th Grade) Color Theory Fundamentals

Since we will be spending the entire month of November studying oil painting it is crucial we have a firm understanding of the basics of color theory and how that applies to mixing color. This is a traditional color wheel showing the pure color (also referred to as hue). You will see that each color is then tinted with the addition of white, toned with the addition of grey and shaded with the addition of black. This is the most simple way to control value with color, note that an even greater range of tones is possible by mixing more ore less white, grey or black accordingly.


This exercise is called a color identity test. Here the student is working with paints straight from the tube, unmixed. Each color is applied as a thick "chip" of paint and then thinned with linseed oil in the box below to see how the color acts as a transparent glaze and with the addition of white in the box below that. The true nature of a color is difficult to read in its pure unmixed form. Adding white or thinning the color allows us to see the temperature and "feel" of the color much easier. The pure color unmixed is said to be fully saturated. Chroma is another word that describes how bright or intense a color is.


This student color chart shows color tone gradations matching a grey scale, color wheels, and neutrals made through the use of compliments. Each "test" shows a different effect and range of tones and color saturations. Note the bottom color wheel is using the mixture of compliments to achieve neutralized tones.


This scale demonstrates the use of complimentary colors to achieve darker values. At some point, the chips will be so balanced that the color is neither one nor the other. This chip is what we would classically call mud, a color that's over-mixed with it's compliment or is too neutral to have a color identity.


This student mixing chart shows neutral gradations of various pairs of colors (generally complimentary colors).


This final student color wheel chart shows different triads. Color wheels can be made of as many colors there are tube pigments. Which red, which yellow, which blue should be used? The reality for painters is that we are dependent on pigments, not just theories of colors. Experimenting with many color wheels and many primary triads is important and closer to the truth for painters. Note the earth palette color wheel of yellow ochre, ivory black (blue) and venetian red is a much less saturated version of a traditional color wheel.


Additional information here

*Al Gury's Color For Painters is an excellent reference and resource I found to be extremely useful and have referenced here, copies can be found on amazon for as little as $8.

Friday, October 28, 2011

Foundation HW (9th Grade)

DUE FRIDAY NOVEMBER 4TH


Complete the following in your sketchbook:

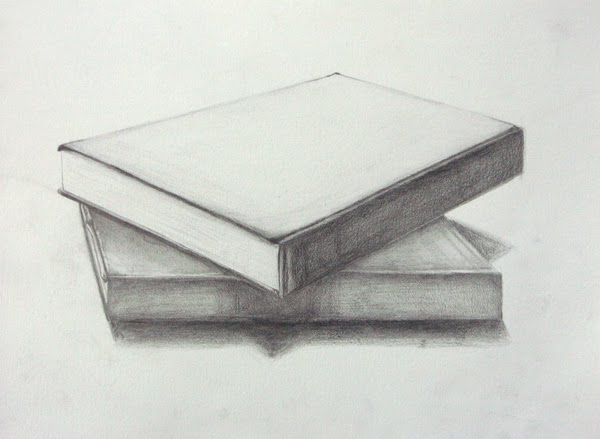
1. A grouping of three books, one opened. Pay close attention to the angles created by the edges of the books.

2. An arrangement of a cup and a saucer, and a sugar bowl. If you do not have these a cup, small plate and a small bowl will suffice. Remember to have objects overlap, not kissing one another or the edge of your paper

*NOTE:
- All objects must have obvious highlight and shadow. Please include cast shadows when they are present.
-All images must fill page.
- When showing more than one object in a composition, the objects must overlap.
- If your sketchbook is smaller than 8.5" x 11" complete each drawing as a two page spread to allow you enough room to develop your drawing.
- Give yourself adequate time to work on your drawings... doing them the night before will most likely result in a rushed, incomplete or under developed drawing and a poor grade.

Intermediate HW (10th Grade)


DUE FRIDAY NOVEMBER 4TH:

Complete the following in your sketchbook:

1. A group of two chairs, a table, and a lamp. Make sure you check your angles and proportions to achieve convincing perspective and a believable space. You may also refer to your composition notes for tips to achieve depth.

2. A dishrack with two dishes and a cup or glass. Pay close attention to the reflected light and the values seen through the glass.

*NOTE:
- All objects must have obvious highlight and shadow. Please include cast shadows when they are present.
-All images must fill page.
- When showing more than one object in a composition, the objects must overlap.
- If your sketchbook is smaller than 8.5" x 11" complete each drawing as a two page spread to allow you enough room to develop your drawing.

Thursday, October 27, 2011

Sighting Review


*Poached from MCC Drawing Blog

"You can estimate proportions and then check them with a fair degree of accuracy by employing what is called the thumb-and-pencil method of finding proportions. This is done by simply placing your pencil or pen in your hand and then holding it at arms length between your eye and the object that you plan to draw. Here is how:


(1) Hold your body rigid and extend your dominant arm (usually the right arm), pencil in your hand, to its full length.
(2) Place your thumb against the pencil as a gauge (sliding it up and down or to the left or the right, depending on the unit of measurement you wish to establish).

(3)Bring the pencil on a line with your eye and the object that you are measuring.
(4) Try to find one part by which you can then measure the rest of the object. In the diagram above, the head is used as a unit of measurement to determine the length of the subject's body. This is done by aligning the tip of the pencil with the edge of the snout, and the thumb is resting on the pencil to where the head ends at the start of the neck. The tiger above is thus, six heads in length.

(5) Once you find a part to which to measure the rest of the parts of the object, you can then proceed to put in the object’s details, still using the same scale of measurement in which you established.


An example of how to use your pencil as a measuring stick to find the height and width of the house with the use of your pencil and thumb. You can also find the angle of the roof with this method. In drawing the house (as shown above), the height of the chimney might be taken as a standard of measurement. Hold the pencil upright, the top on a line with the chimney top. Now move the thumb downwards until the end of your thumb comes between your eye and the bottom of the chimney. Then draw the chimney. Repeat this measuring operation, finding where the length of the chimney corresponds to other parts of the house. Your pencil can be moved between the house and your eye and by using the chimney length as your standard of measurement, the corresponding length and width of the house can be estimated.

With the pencil and thumb measuring technique, you can even find the angle of an object, such as the house’s roof. Just hold your pencil parallel with the object (in this case the roof). Then, without changing the position or angle of your pencil, just bring it down to your paper and make a light stroke indicating the angle.


Likewise, by sliding the pencil up or down so as to increase or decrease its length between the points ‘a’ and ‘b’, (shown above) you will be able to check the height of an object as shown below. The same principle applies for heights and lengths/widths.


Above is a demonstration of the height of a cone being checked, while the bottom demonstrates the width of the cone being checked.

This thumb-and-pencil method of checking is easy to understand once you experiment with it. Be sure, however, that you do not change your position or distance from the model once you have started to check, since distance and position change the appearance and size of any object under study."